
For this technique you will need the following:
Grunge Paper,
Distress Ink
WOW! Clear Gloss Embossing Powder Ultra High, Copper and Gold Ultra High Powder
Embossing Ink Pad
Heat Gun
Embossing Folder
Die Cutting / Embossing Machine
1, Using the Direct to Paper technique cover the grungepaper with Distress Ink, here I used Walnut Stain and Brushed Corduroy.

2. Once the paper is covered with ink, pour over the WOW! Ultra High Clear Powder and heat. You need to do this quickly as the Distress Ink doesn't stay wet for long.
3. You should now have something that looks like this

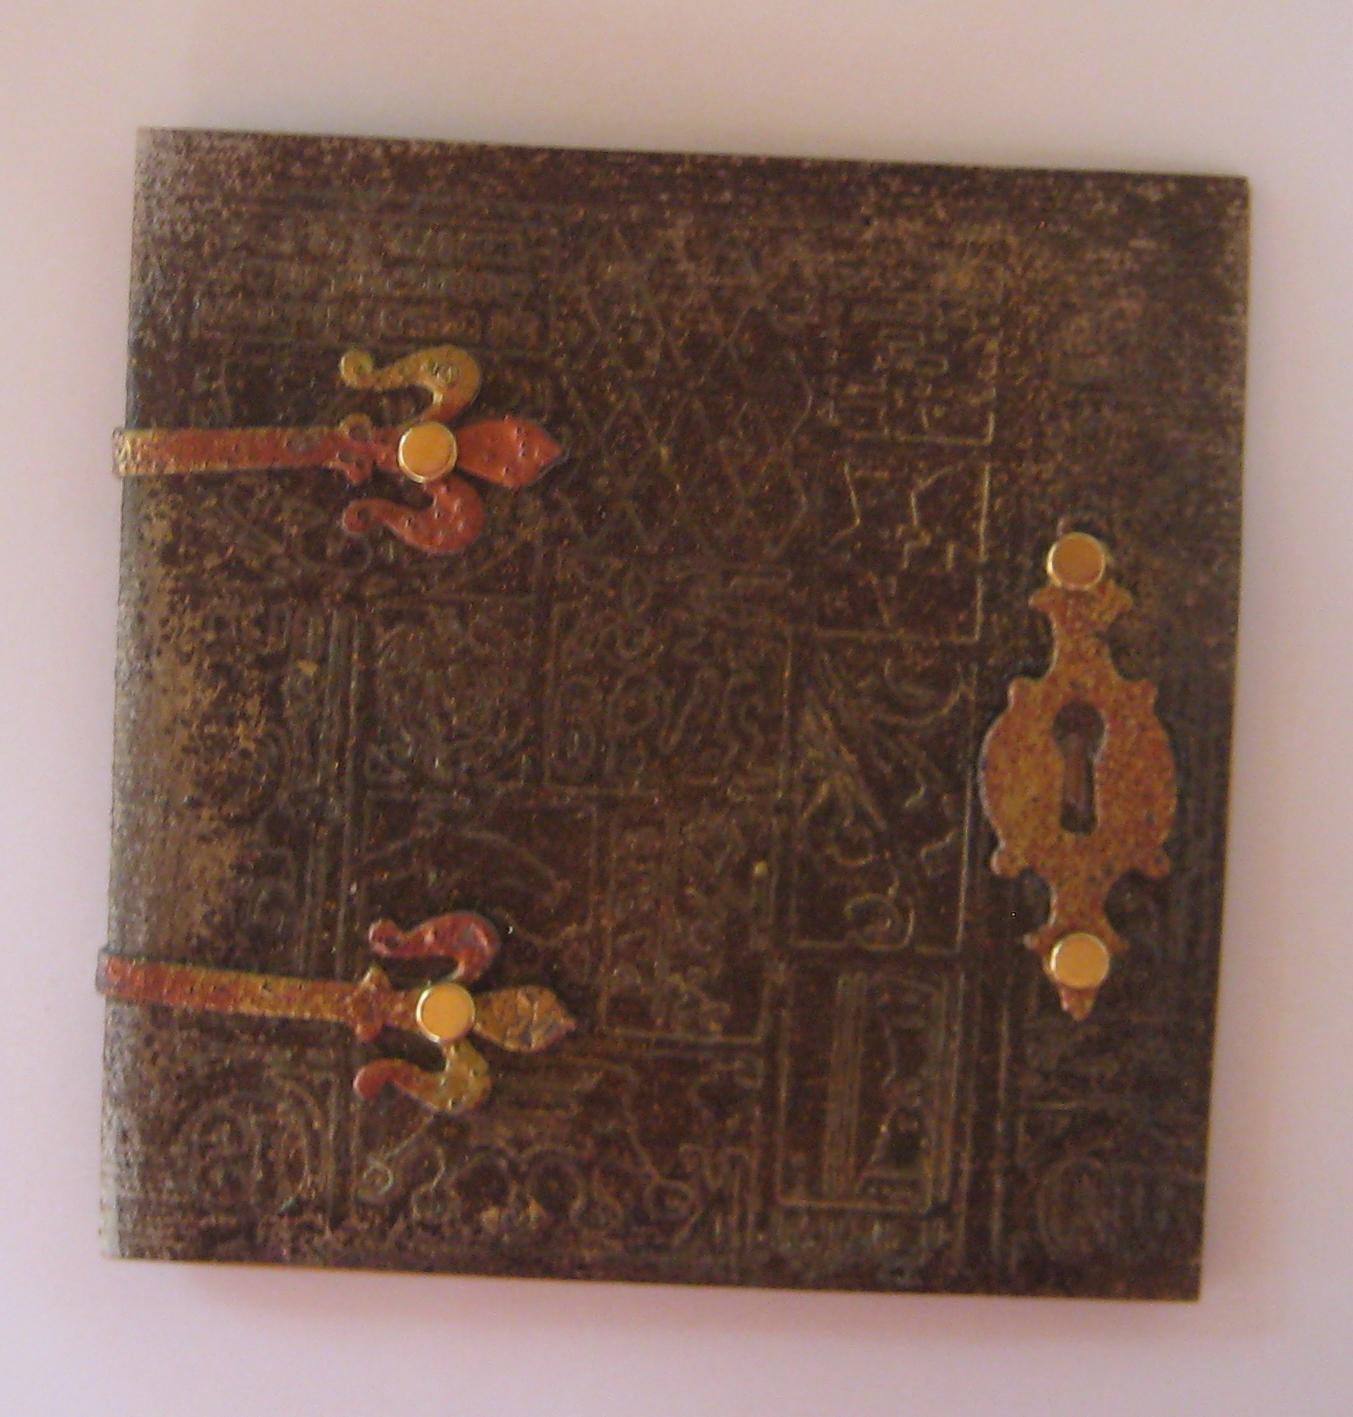
4. Using the Embossing Folder run the piece through the die cutting / embossing machine to emboss. Then rub over the embossed areas with Black Soot Distress Ink. I also used a gold ink pad to highlight the embossed areas.

5. The "metal work" was created from Grungepaper shapes which were covered with embossing ink, coated with a mixture of WOW! Copper and Gold Ultra High Powders and the heated.
6. The metal work was then attached with silicone glue to mimic a book cover
I hope you have fun trying this new technique - Emma (The Sparkly Fairy)
I can see why your product are called wow, that leather effect is stunning. Very inventive, and something I'm not sure I would have thought of. Well done.
ReplyDeleteEmma, that´s a fantastic tudorial! I never try to use this technic befor but now I will give it a go. Your old book looks like a reall piece from the past! Fantastic! xx Bianca
ReplyDeleteFantastic effect, and a lot easier than the method I had guessed at! Which embossing folder did you use?
ReplyDeleteWow! That is amazing it realy does look like leather. I'm glad you included a photo for step 3 as if I got that I would think it had gone wrong somewhere.
ReplyDeleteThanks all!
ReplyDeleteThis is great Emma - loads of people asked how it was made at the NEC so I'm glad you've done a tutorial x
ReplyDeleteWow !!!!! pardon the pun Emma this is truelly stunning - something I am definately going to try Thanks for sharing your Talents x Hilda
ReplyDeleteThanks for sharing, I'll definetly be having a go at this. x
ReplyDelete