
Happy Holidays in September? Well, why not? Let's get ahead on those Christmas cards!


UK https://www.wowembossingpowder.co.uk/
Hi, it's Erica back on the WOW! blog and YouTube channel today with two polar opposite cards, but both are relatively easy to mass-produce as well as changing up the colour scheme.

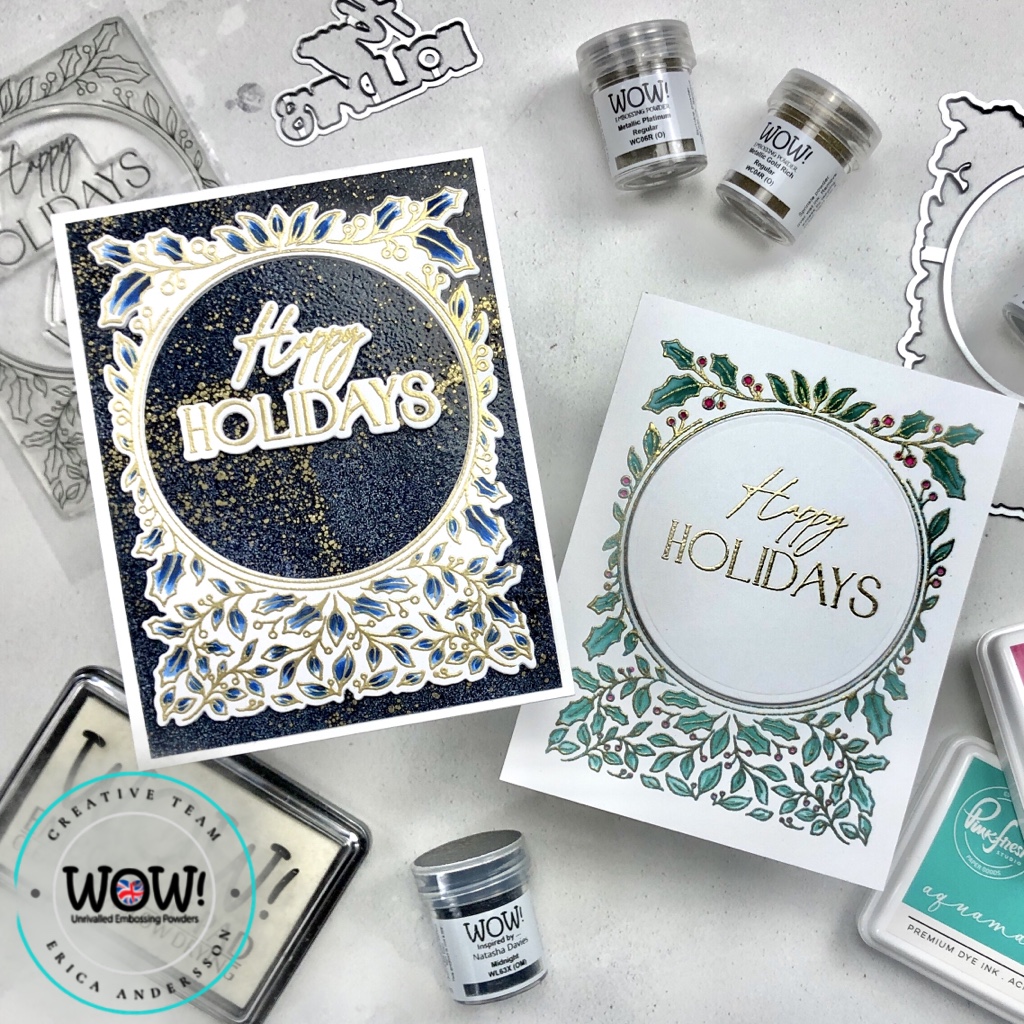
I have used the newly released Happy Holidays Circle Frame stamp set and coordinating diecut from Pinkfresh, with some gorgeous, yummy embossing powders. The Happy Holidays Circle Frame set also comes with coordinating layering stencils.
The first card is done by stamping up the Happy Holidays Circle Frame with the Embossing Pad, and then sprinkling Egyptian Turquoise on it. This was set with the Heat Tool, and set aside to cool. Hey, that rhymes!

On this I have used the coordinating layering stencils, and ink blended some Aquamarine, Mermaid Cove and Raspberry Bliss to create a soft look.
This card I wanted to keep lots of white space on, but it still needed a little something to make it pop. The solution was to layer up some of the circles that were left over from cutting out the pieces I intended to use on the second card. Less waste, yay! On the top one of these I heat embossed Happy Holidays in Platinum embossing powder to keep it cohesive, and then this was added to the card. Easy, peasy, lemon, squeezy!

Card no2 took a bit longer, but man, was it worth it! I'm totally and utterly obsessed with Midnight, the navy embossing powder in the Twilight trio. It has gold flecks in it and oooooooh, mama. It's so gorgeous. I did a whole panel of this by dabbing the Embossing Pad on it, and then covering the whole shebang with the Midnight powder, before setting it with the Heat tool.
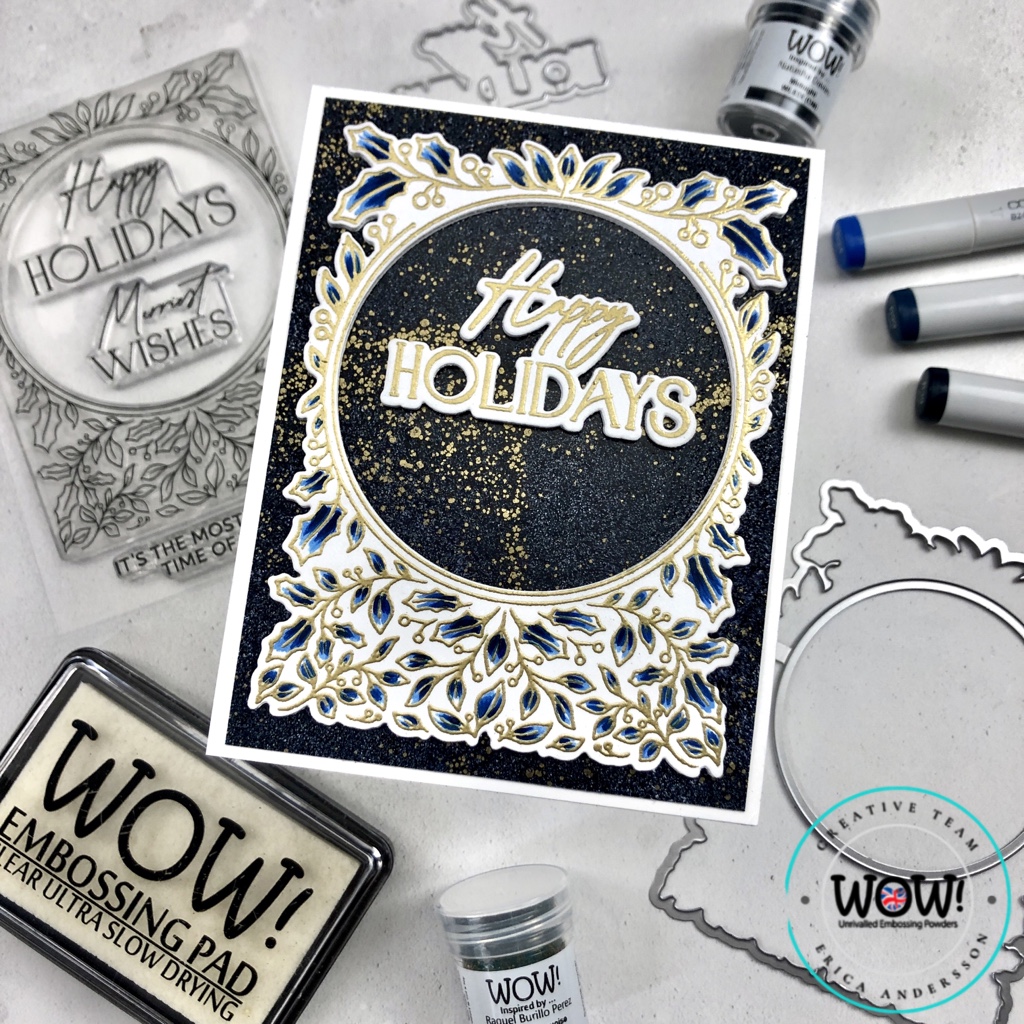
The Happy Holidays Circle Frame stamp was stamped up and this time done in Rich Gold, and on this piece I added some colour with blue copies, rather than ink blend. This piece was then layered up with the pieces I had already cut out using the coordinating diecut. The Happy Holidays was also stamped up and heat embossed with Rich Gold, as well as layered up with extra diecut pieces.
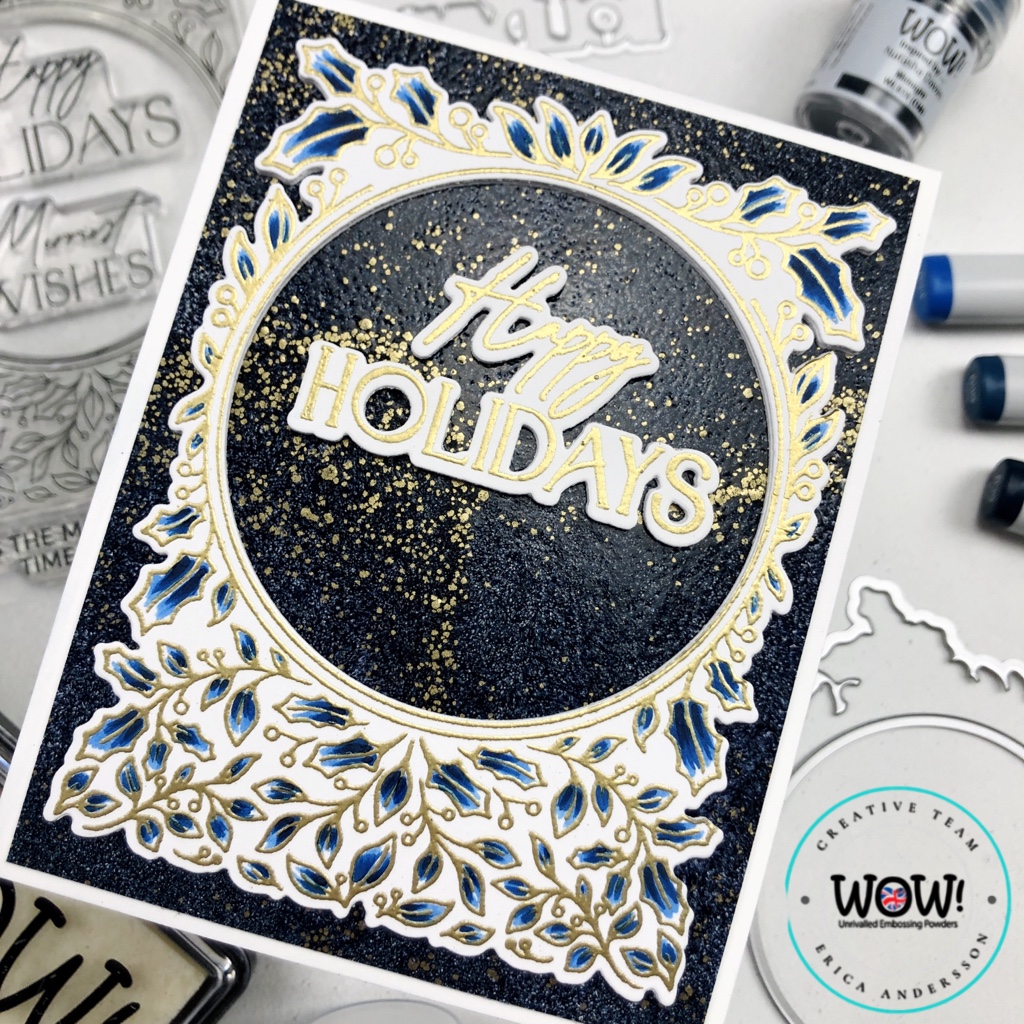
All of this was then adhered to the background piece, that had been trimmed down a tiny bit and glued down to a white card base. So simple, but impactful, and the design can be easily changed around by using different colours or embossing powders!
There is a video for these over on the WOW! Embossing YouTube channel as well, I hope you get a chance to check it out.
Until next time, lots of love and happy crafting from Erica
You can find more from me here
Connect With Us:
Powder Arts Thermography Warehouse LTD, Caslon House, Lyon Way, St Albans, AL4 0LB
UK https://www.wowembossingpowder.co.uk/
Comments
Post a Comment