Hi friends,
It's Colleen and I'm back one more time to Guest Design on the WOW! blog! I have really enjoyed these past two months experimenting with my favorite embossing powders again! Today I want to share how to use embossing powder with your mixed media projects! I've got a video tutorial as well, so I'll keep my blog post brief as the video explains most of it!
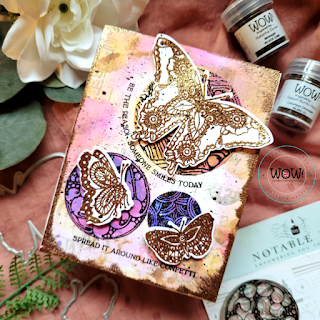
Here are the steps I took to achieve this luscious mixed media delight!
1. Apply Ultra Slow Drying Embossing pad directly onto the edges of the inked up card panel.
2. Add Luxurious Chocolate embossing powder over the sticky embossing ink and heat set with WOW! dual speed heat tool.
3. If needed, run the card panel through your die cut machine to flatten it completely and then adhere to a white A2 sized card base.
4. Apply your favorite oxide inks onto 3 white card panels and then stamp 3 different sizes of Tangle Rounds by Notable Ink over the ink using the Ultra Slow Drying ink pad. Apply Midnight embossing powder over each and heat set with dual speed heat tool.
5. Die cut each Tangle Round with circle dies and adhere onto the card base.
6. Add desired sentiment.
7. Stamp the largest butterfly from Beautiful Butterflies 2 by Gina K Designs onto a white card panel using Ultra Slow Drying ink pad and Luxurious Chocolate embossing powder. Heat set with dual speed heat tool. Repeat the process with 2 of the smaller butterflies from the set. Die cut all the pieces.
8. Apply foam tape to the back of the butterflies and adhere them over each of the tangle rounds. Be sure to leave a bit of the design from the Tangle Rounds showing through!
Here are a few close up photos of my card so that you can see the details! Remember to watch the video for full details on how this card was created!
I'm so glad you stopped by today and I hope that you enjoyed this tutorial session!
Connect With Us:
Powder Arts Thermography Warehouse LTD, Caslon House, Lyon Way, St Albans, AL4 0LBUK https://www.wowembossingpowder.co.uk?aff=11


What fabulous colours and I love the look of the wonderful embossed tangled rounds for each of your pretty embossed butterflies to rest on, and the added embossing round the edge of the piece really draws the eye in. A beautiful card! x
ReplyDelete