Hello and nice to see you here at WOW Embossing Powders... Donna here tonight to share a tutorial on how to make your own Dew Drops using WOW Melt It Powders. I must warn you that this is VERY ADDICTIVE and once you start you will want to make some of every colour.
Before we start... Can I please point out that I don't own a melting pot and I use my heat gun. If you are going to have a try at this can you PLEASE PLEASE PLEASE be very CAREFUL! The melt it powder is VERY HOT and it will BURN! Please have a bowl of water handle just in case, to pop you hand in straight away. It is just a friendly warning, using heating tool of any form can burn and its good to be on the safe side.
Right time to get started, I hope you have made a nice cuppa because there is a few photos :-)
HOW TO MAKE YOUR OWN DEW DROPS
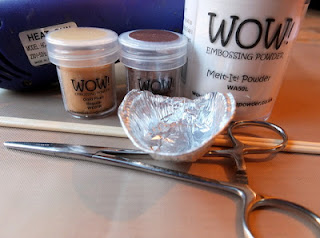
You will need Melt it powder, any Regular coloured powder ( I have used Metallic Copper), Heat proof non stick craft mat, mixer( kebab sticks are great for this) pliers to hold tart foil container.
Mix a teaspoon of melt it powder with 1/5 teaspoon ( just a little bit)
of the regular colour powder of choice
Mix these very well
Make a spout at one end of for tart foil tin for pouring.
Take pliers and attach to opposite end from spout.
Hold up high enough for you to place your heat gun under the tin and start to heat the melt art.
keep the heat on the underside of the tin. If you do it from above while
there is still powder it will blow away
Once it is completely melted you can bring the heat gun
to the top and push liquid towards the spout.
pour out gently moving along to create your drops
As the melt it starts to cool off it will be harder to create perfect round ones.
Don't worry there is no waste.
Just pick up the odd shaped ones and place back into tin, reheat
and pour :-)
My favourite ones to make are clear ones as they go on any project.
I have some to show you here with the copper ones I just made.
Once cooled (which is only a few seconds) push lightly with your finger and they will
come away easily from the craft sheet.
Now you are ready to start adding some 3D by applying them to your projects.
Hope you enjoyed my wee share , Have fun and please remember to BE CAREFUL! xox Donna


wow thats a smart idea...
ReplyDeleteCoool! I saw this at your booth on a crafts show and still need to get those tins, but I will find some! Tahnk you for the tutorial, its a great way to keep the technique in mind! Hugs, Baerbel, Germany
ReplyDelete